Macrame jewelry is a timeless craft that combines simplicity with elegance. In this tutorial, we break down how to create a stunning two-tone macrame bracelet using basic knotting techniques. Whether you’re looking to create a personalized gift or a new accessory for your collection, this project is perfect for crafters of all levels.
Materials Needed
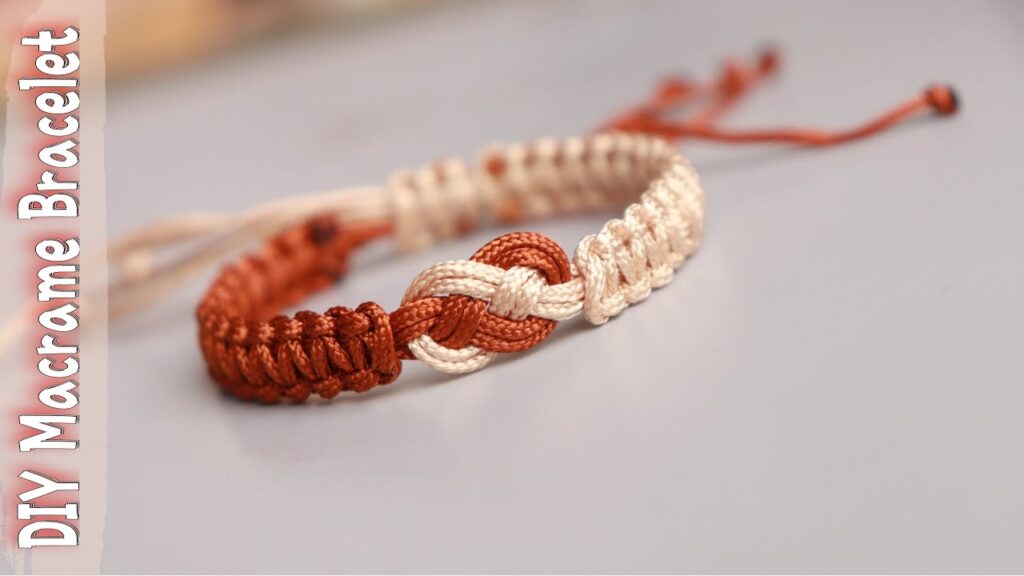
- Macrame Thread (2mm): * 2 strands of 12 inches each (Base/Core colors) [00:10]
- 1 strand of 30 inches (Working cord) [01:30]
- Tools: Scissors and a lighter (for finishing ends).
Step 1: Setting the Foundation
Begin by taking your two 12-inch base strands. Fold them to find the center and create an interlocking loop. This forms the decorative central knot of your bracelet [00:20]. Secure these strands to your workspace using tape to keep the tension consistent while you work.
Step 2: The Square Knot Technique
The body of the bracelet is created using a series of square knots.
- Take your 30-inch strand and place it horizontally under your base strands [01:40].
- Cross the left cord over the center and under the right cord.
- Bring the right cord through the loop created on the left side and pull tight [01:56].
- Repeat the process starting from the right side to complete one full square knot.
Step 3: Building the Pattern
Continue knotting until you reach your desired length. In this tutorial, we use two different colors to create a striking contrast [02:55]. Once one half is finished, repeat the same process on the opposite side of the center knot [02:56].
Step 4: Finishing and the Sliding Knot
To ensure the bracelet is adjustable:
- Trim the excess thread with scissors and carefully singe the ends with a lighter to prevent fraying [03:05].
- Overlap the ends of the bracelet and tie a final series of square knots around them [04:18].
- This creates a Sliding Knot [04:19], allowing the bracelet to expand and contract to fit any wrist size.
Final Result
You now have a beautiful, handmade macrame bracelet! This technique can be adapted with different cord colors or by adding beads into the knots for extra flair.